1. Create a new course
If you are logged into your Artusi account, click here to create a course based on a textbook or workbook in the Artusi Curriculum. All course content is fully customizable: you can later add, edit, delete, and rearrange assignments and quizzes as you prefer. (You can also build a course entirely from scratch.)
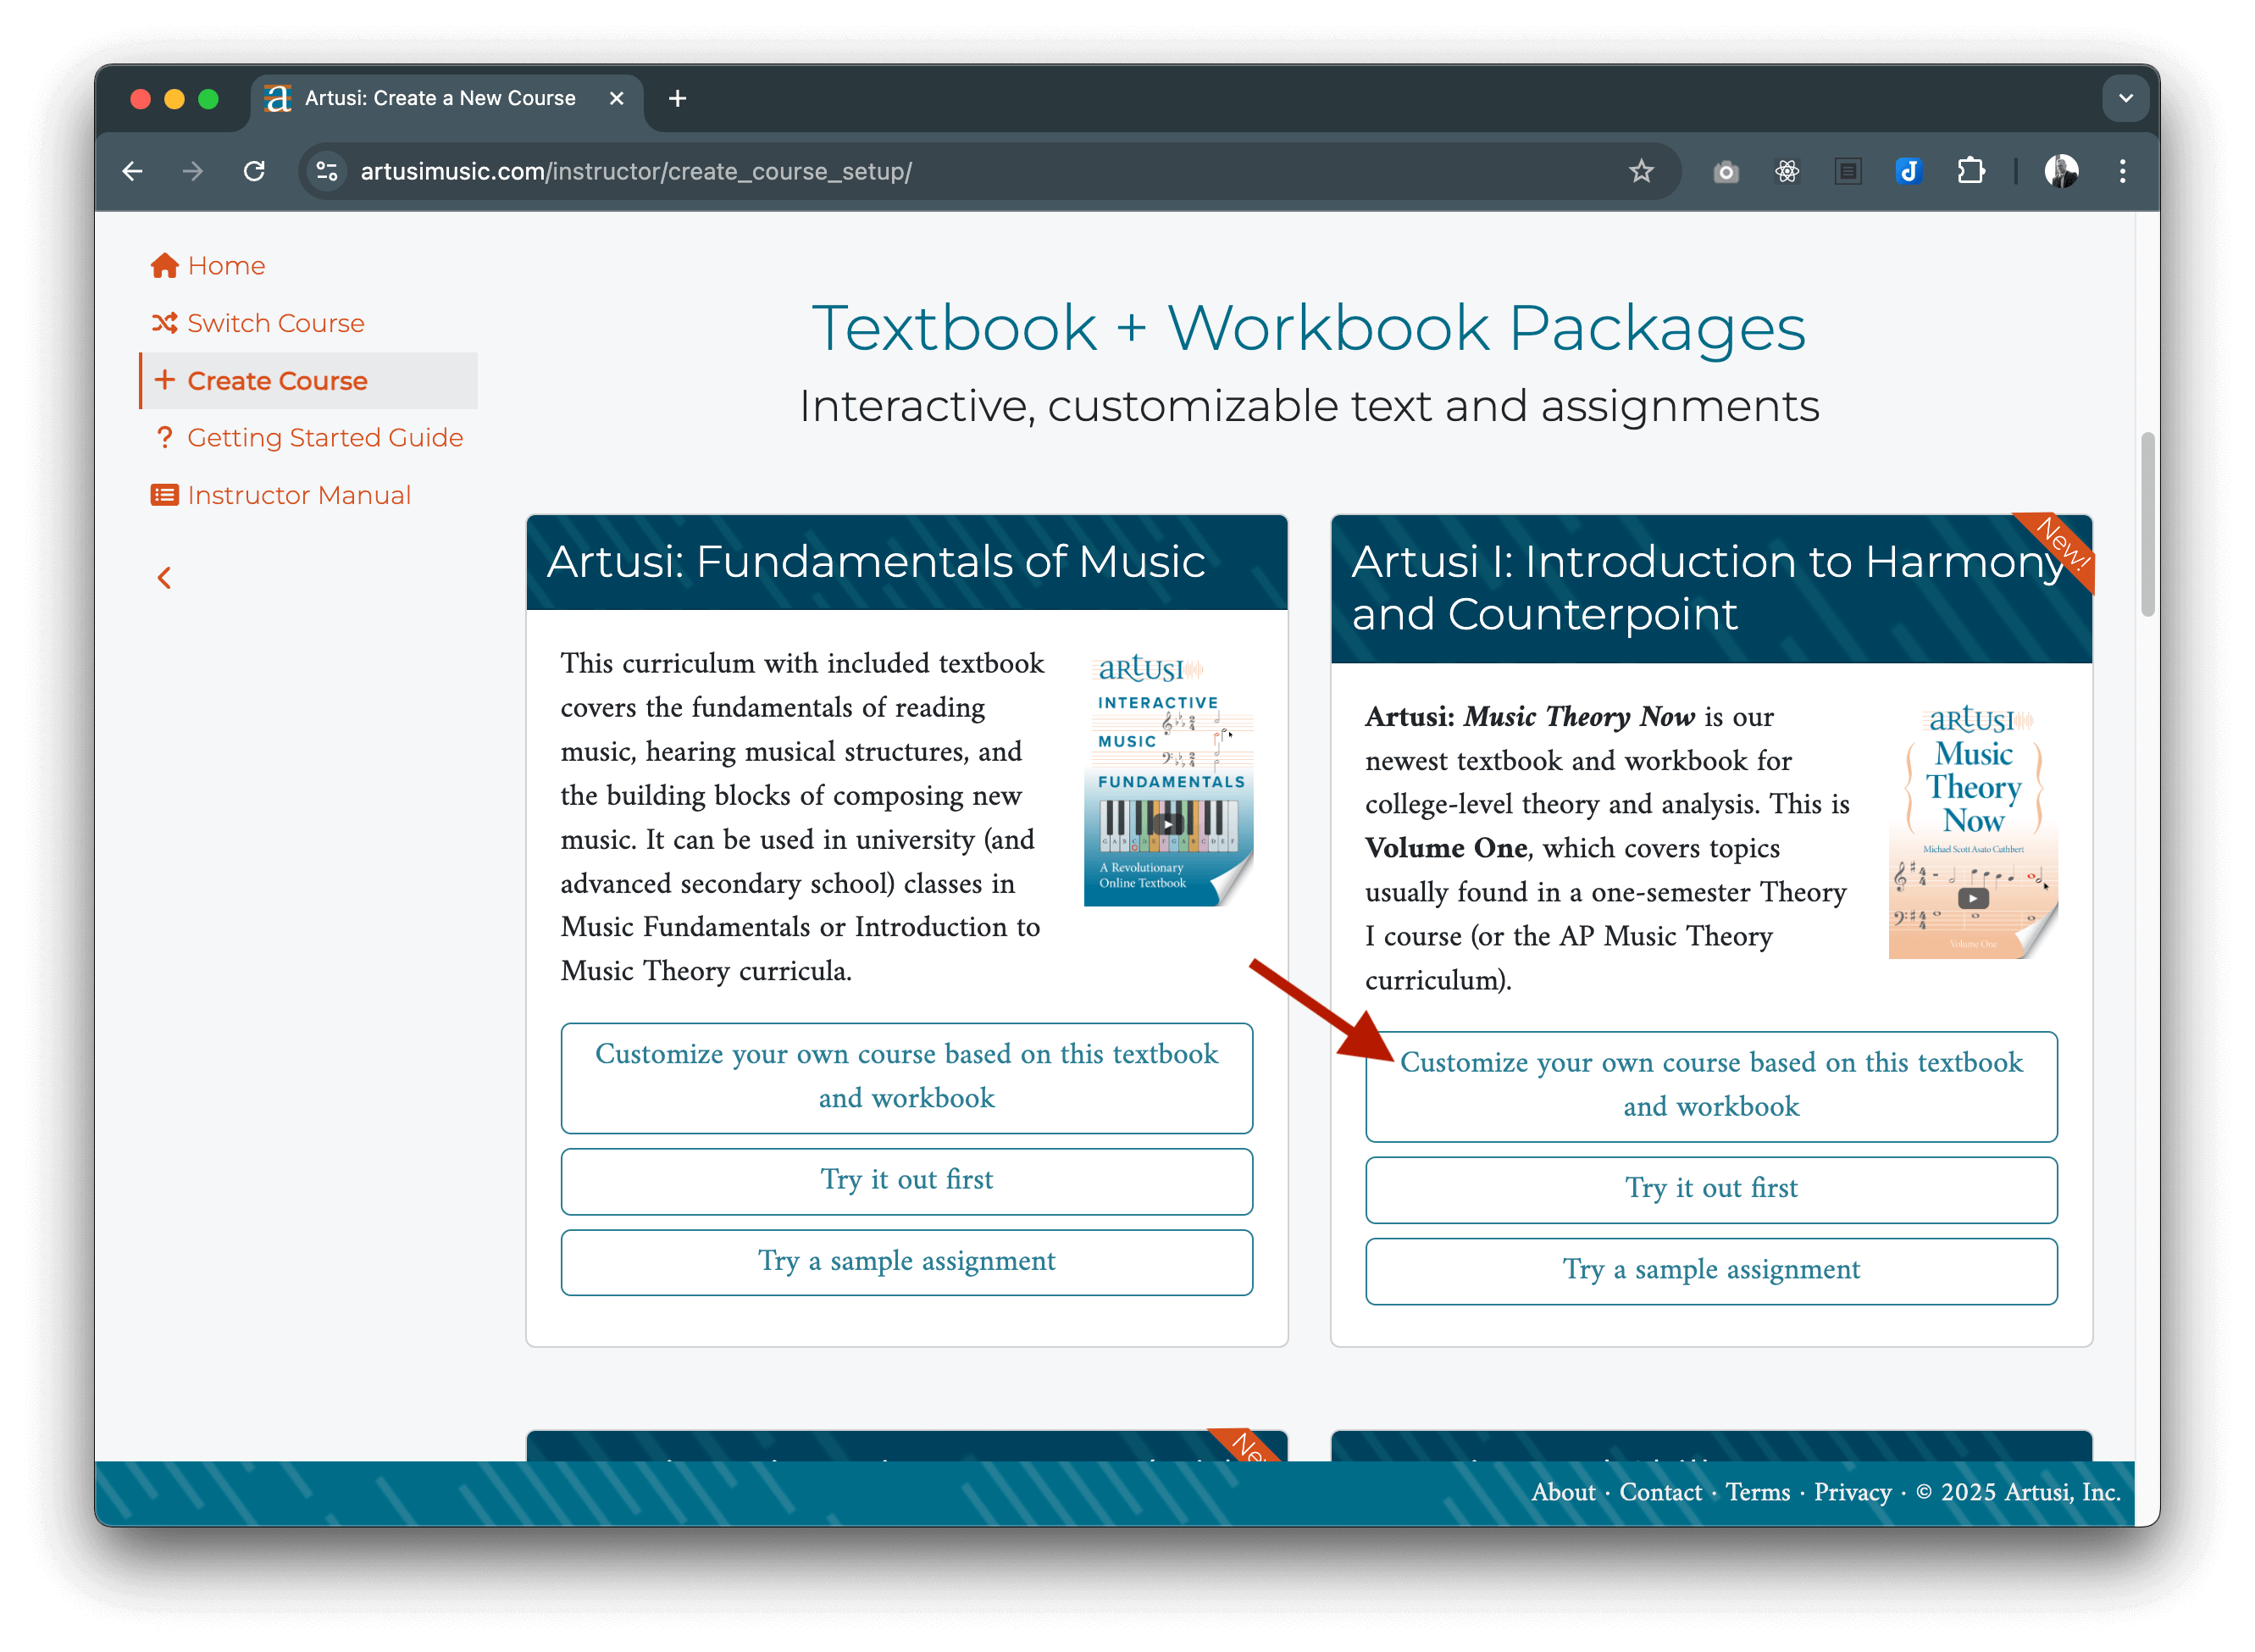
Don’t forget to check out the how-to videos in our Getting Started Guide!
If your institution is planning to purchase a site license, but you don’t have the code yet, don’t worry—go ahead and create your course and the Artusi support team will go in later to apply your site license.
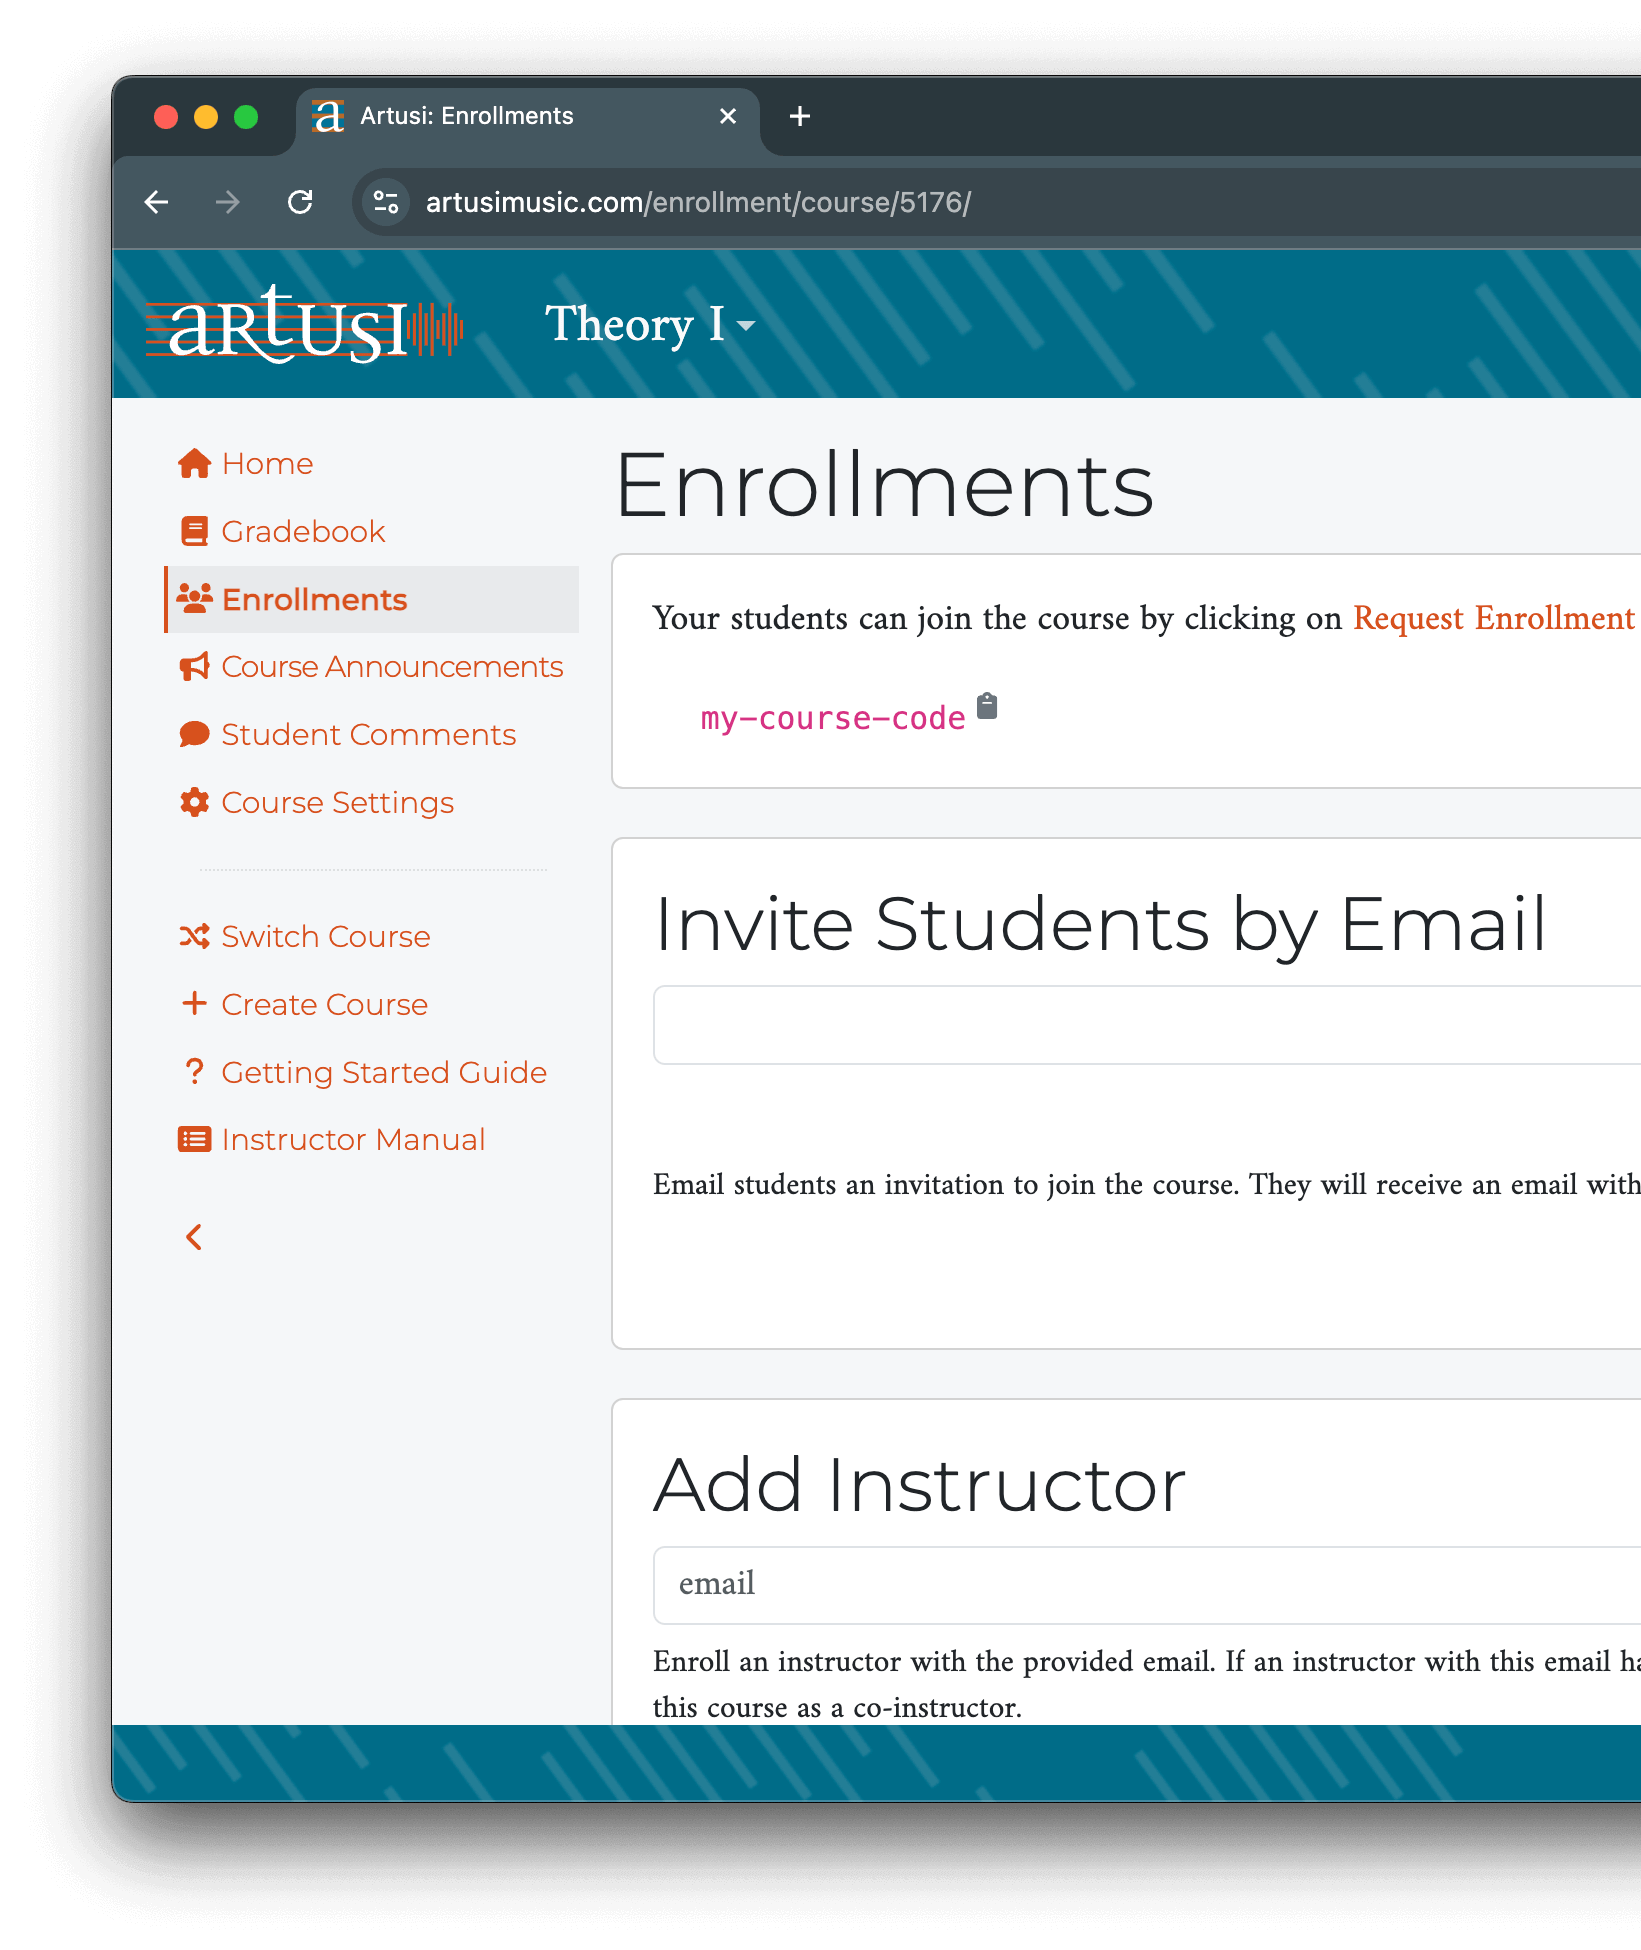
2. Enroll students
From the “Enrollments” page, there are two ways to invite your students to enroll:
- Send students an enrollment code: Once you create a course, the system will generate an enrollment code for that course. Visit the Enrollments page to find the code. Give your students this code so they can enroll in your course.
- Send an invite through Artusi: From the Enrollments page, enter students’ email addresses and send them an invite. They’ll get an email from Artusi inviting them to join.
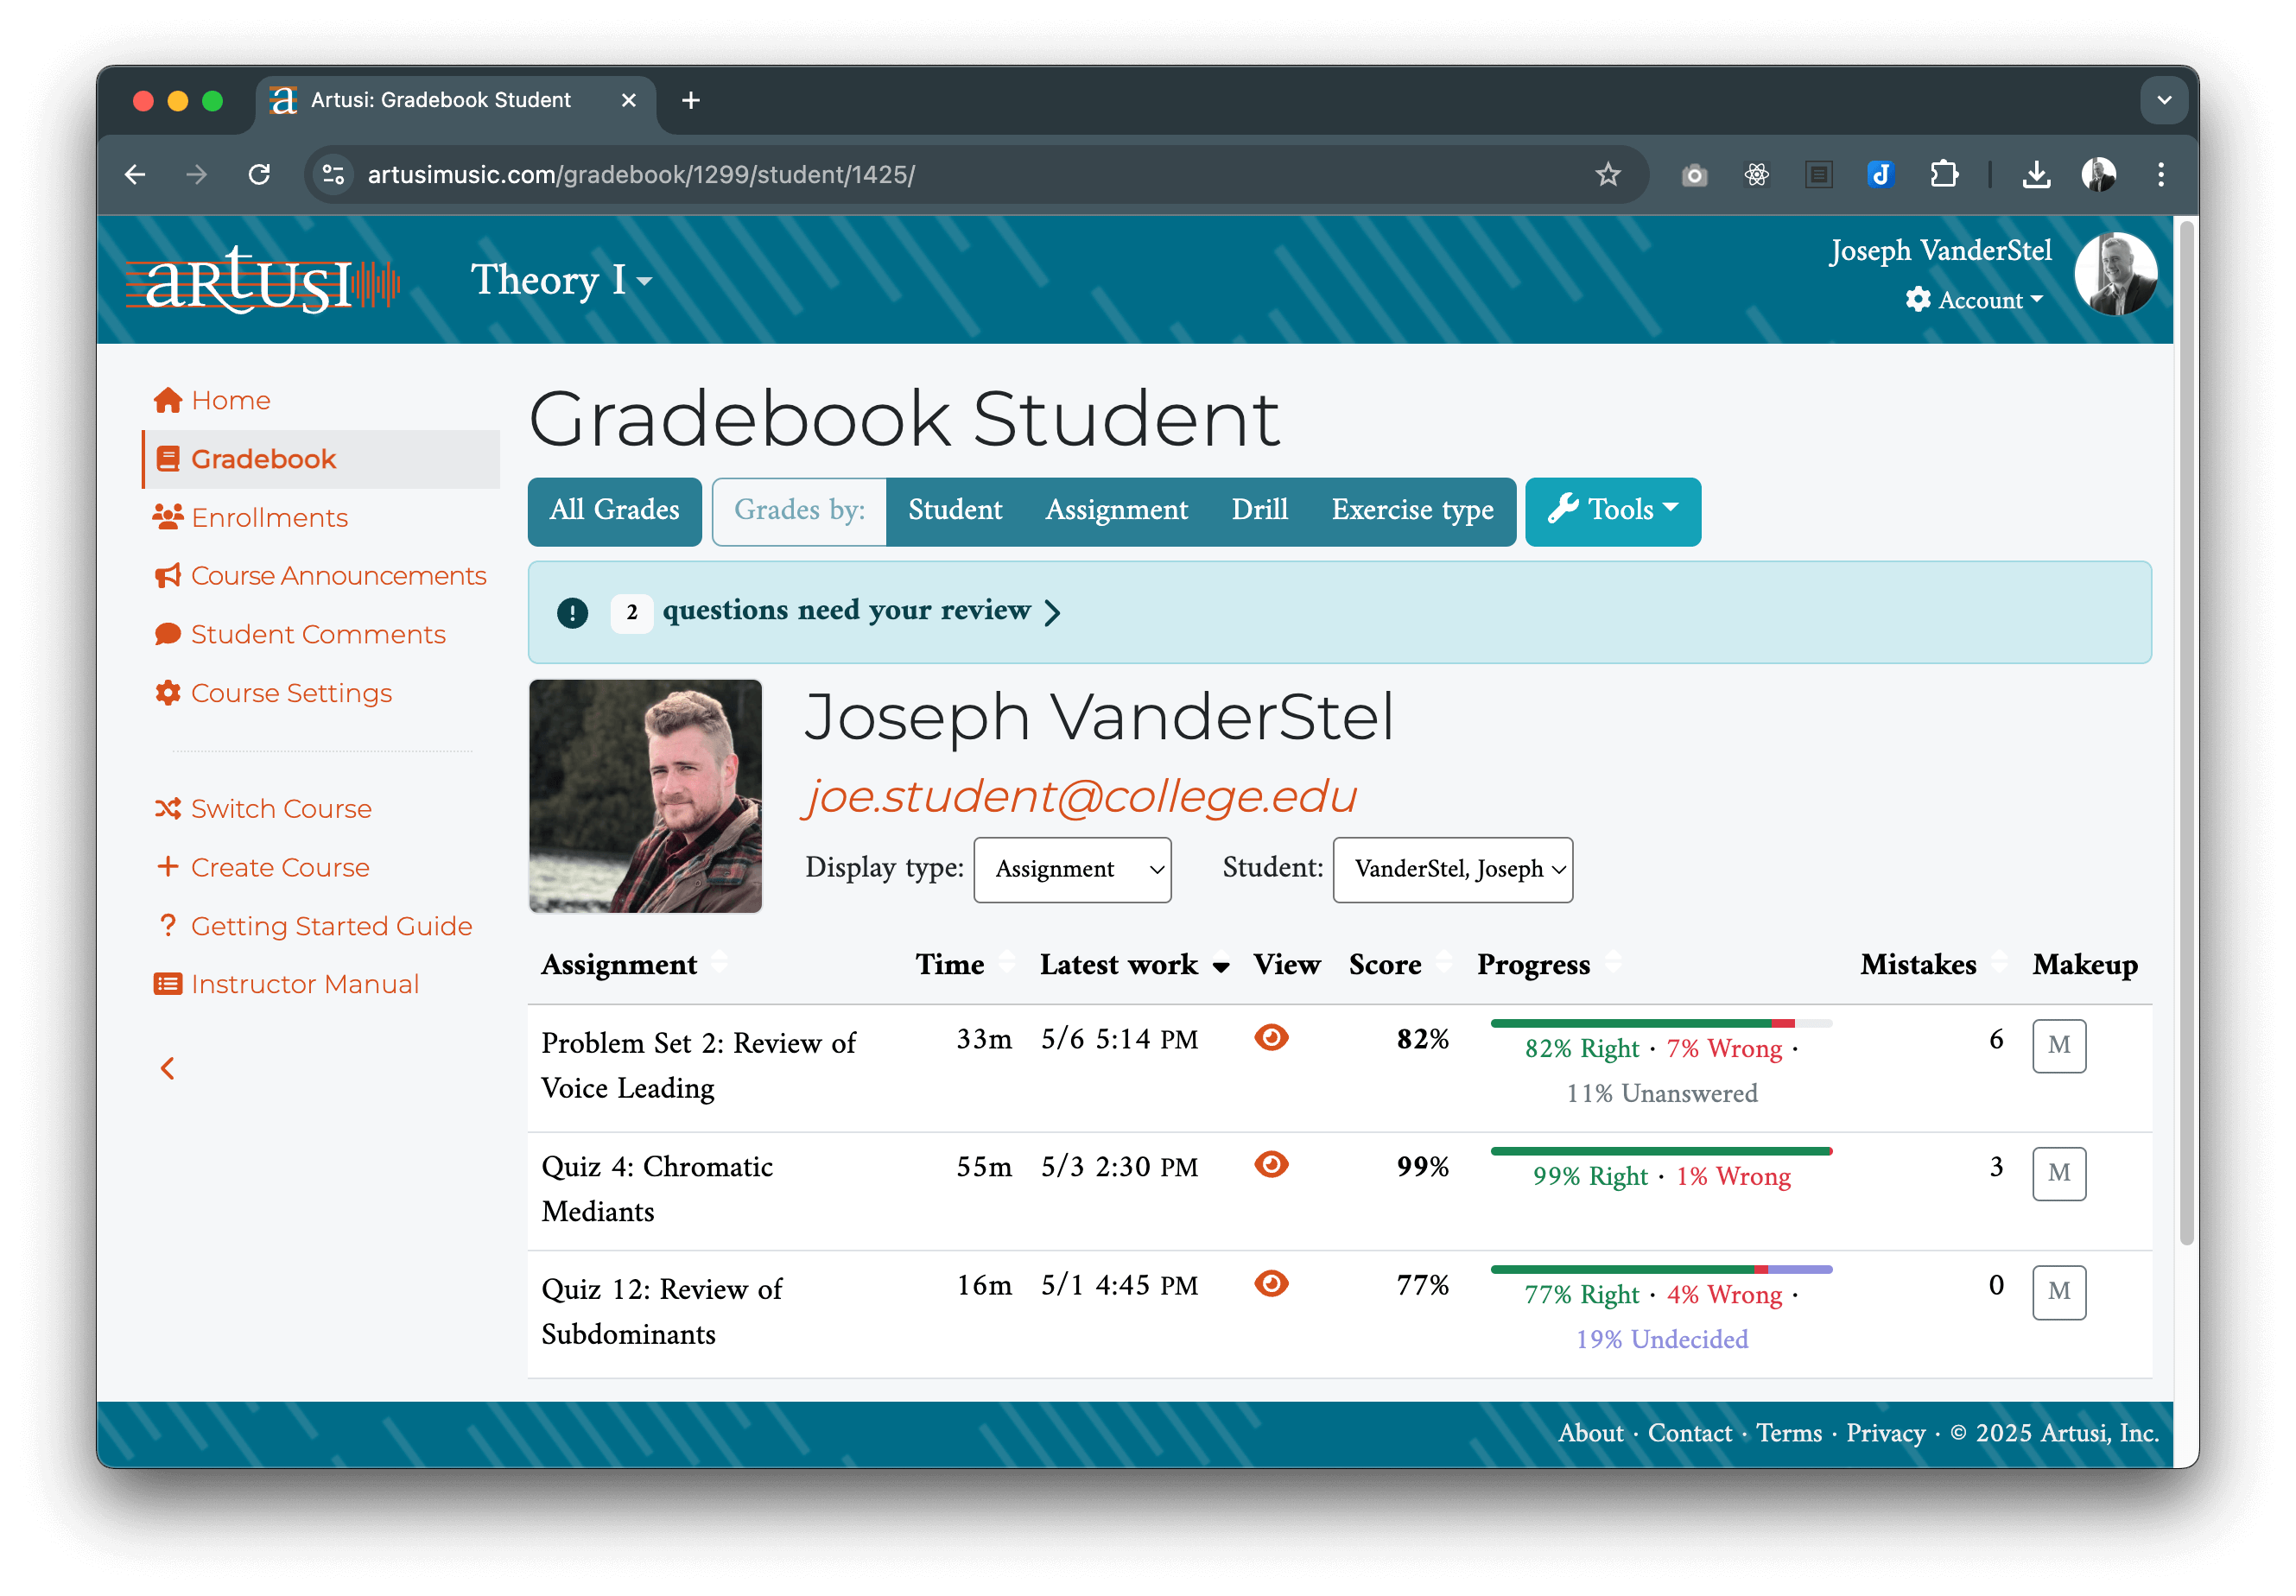
3. View student grades
Click “Gradebook” in the left-hand navigation to view grades by student or assignment.
-
You’ll see at a glance a student’s percentage grade and questions they got
right, wrong, partial credit, and unanswered. You can look directly at
their submissions, see how long they took on each assignment, and track
how many times they attempt an assignment—their specific submission
is always saved in the system. You can also schedule makeup exams for
individual students.
- Do you use Canvas LMS for your course? Artusi can automatically update your Canvas gradebook whenever students submit work. Contact our support staff at support@artusimusic.com to connect Artusi to Canvas, or follow the steps in our LMS integration guide. If you use a different LMS then you can transfer grades from Artusi by downloading your Artusi gradebook as a CSV file and then uploading that file into your LMS. It takes about 8 seconds.
- Students have a three week or three assignment grace period before they need to purchase Artusi. This way students have time if they decide to drop the class, or if they are waiting for financial aid or other disbursements to come through.
- After the three week/three assignment grace period, students must purchase access. Students will be able to do their work and their work will be saved in the system even if they haven’t purchased access, but their grades and progress will not be displayed to either the student or the instructor.
4. What if my institution buys it instead of students?
- No problem—we can invoice you! Let us know if there is a specific type of invoice you need.
- Many schools and universities also want a contract to make sure they and we are complying with the appropriate privacy regulations. We are glad to help! See our privacy policy here and let us know if we should send a standard information or if there is a specific contract you like to use.